Congratulations. You’ve written your book. Edited your book. Designed your book beautifully in InDesign. Now there is just one final hurdle! Exporting this damn thing into a beautiful PDF that your printer can work with.
Thanks to Kevin Hall for letting me use his book cover we designed as an example and inspiration. You can check Kevin out here or find his book across NZ in bookstores, or worldwide on Amazon here.

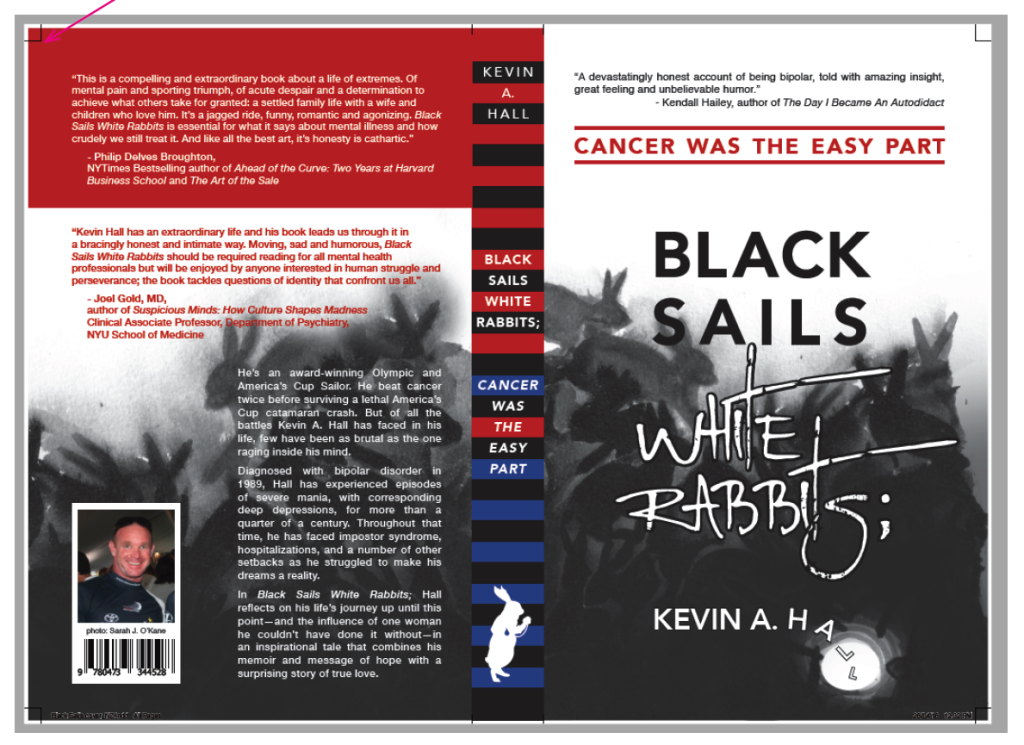
Firstly, here is what a cover should look like! There are trim marks showing where we will cut, and images extending past the cutlines. Oh and for the people who are asking, you get the spine marks by creating a 3-page spread.
To export PDFs from InDesign you go: ‘File’ -> ‘Export’ … Or ‘File’ -> ‘Adobe PDF Presets’ -> ‘select the correct option’. Follow the below steps to install BookPrint preset export options to Indesign.
To install these JobOptions files, please download them. Then click ‘File’ -> ‘Adobe PDF Presets’ -> ‘Define’
Download the job.options files here.[wpdm_package id=’12042′][wpdm_package id=’12039′]

Select ‘Load’ -> find your files and select them. Select ‘Done’. You will now find the BookPrint preset available in InDesign. There are two to install – one for Texts and one for Covers.

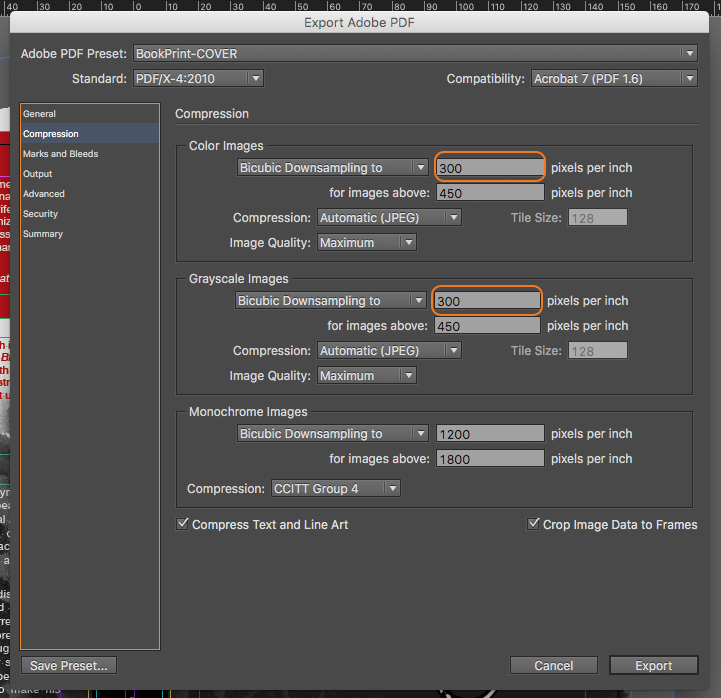
Here is what we recommend when exporting PDFs (note if you are using our JobOptions files these are all preselected).
PDF/X-4
Images look good at 300dpi and best at 600dpi
Line drawings and text should be CMYK vector art
Leave RGB images with their source colour profile (i.e. do not convert to CMYK)
Embed all fonts
Cover file
single spread (back, spine, front)
trim marks
4mm of bleed (softcover)
17mm of bleed (hardcover)
4mm offset (softcover)
17mm offset (hardcover)
Text file
single pages (no spreads)
4mm of bleed
No trim marks required
Way too much information about trim marks – for the curious.
If your whole book is colour or black, your welcome to include trim marks. If you have a mixture of black and colour printing please do not include trim marks. Trim marks are created using registration black (100% C, M, Y & K) this means that our RIP and digital press see these as colour pages and we then need to manually override which pages print black versus colour. If you want to check if your pages are properly black versus CMYK grey (which is actually colour) open them in Adobe Acrobat, open the ‘Print Production’ tools, and open ‘Output Preview’. In this dialog box you can turn off the black ink. On black printing pages when this is turned off there should be an entirely blank page.
Here are three screenshots showing you where these options are in the export dialog boxes.
But before exporting, there are a few things to check you understand.
Bleed. Ensure your book has the correct bleed. When books are created they are printed with a number of pages on a larger sheet, and then cut down to size. When doing this we need to have an allowance of several millimeters because of variances and tolerances of the printer, folder, guillotine, and binder.
Practically for you – you need to produce a PDF file that is larger than your final job. Different companies prefer different sizes ranging from 2.5 to 5mm – we like having 4mm.
InDesign documents that are created with bleed (you can add this at any time in ‘Document Setup’) will have a handy red bleed line. Every image, line or colour that you want to print flush with the edge of the page needs to extend beyond the white InDesign page, onto the grey background area, and all the way to this bleed line. In the below example you can see that the coloured boxed and rabbit image all extend to or past the red bleed line.
In the below example you can see that the red box stops at the page instead of at the red bleed line – this is WRONG.
If the above wrong example is exported it will look like the below PDF. See there will be no red bleeding beyond the cutlines indicated by the trim marks.
Another wrong example – if you have no offset your crop marks will be right on the corner of the artwork and in the way of the bleed. If it is printed like this you will have a millimeter or so of black trim marks left on the corners of your book covers.
Well there you have it folks – make beautiful functional PDFs.
Quick recap: high-resolution images, 4mm of bleed, trim marks, spreads for covers, pages for text.
Any design questions get in touch, or if you would like us to help with cover design check out the options.


