Design Tip #1 Headers & Footers
Subconsciously readers of your book are making thousands of small observations every second as they look into your book for the first time, they notice; the sheen of the cover, pixelation, paper feel, how the page turns, white space. These are all part of answering their first question. Does this book meet my expectations? You need to answer them with a resounding ‘yes’. Or a ’no’ it smashes them out of the proverbial bookshop.
Today you can master one of these important factors. You may never have consciously noticed headers and footers. Or even realised how important they are. I see lots of print files come in where they have forgotten them, given up on them because they are too hard, or created them horribly.
They are important because headers and footers provide the page structure that is consistent throughout a book. This is where helpful or important information is contained, such as page numbers, a book title, an author name or chapter titles.
Follow these tips to ensure your book measures up.
- For most chapter books it to have your Title on the left-hand page in an open spread, your chapter name on the right-hand page.
- For books without chapter names, you keep the title on the left page, but use the author’s name on the right-hand page.
- Page numbers are typically in the footer and either aligned to the middle of each page – or the outside of each page.
Common ugly mistakes
Please make sure you don’t make these easily avoidable design implosions.
- Page numbers that are aligned left or right in word (as opposed to the outside) – this then places one of the numbers in the spine.
- Headers or footers that are so close to the block of text that visually the reader can’t separate them (bonus tip: try using a different shade for headers to visually help them stand apart from the text).
- Headers on chapter starts. On your chapter starts create a different header that is blank. Some people also like to use blank headers on blank pages.
For more information check out www.bookprint.co.nz/headers-and-footers
If you are paying a designer to typeset your book please ensure (s)he is doing this correctly or your book will suffer for it. If you are typesetting your book yourself read on for a walkthrough in Microsoft Word, or skip down for a walkthrough in Adobe InDesign.
Microsoft Word Walkthrough
In order to ensure consistency, and to save time. You do not want to manually enter headers on footers on every page so we will use Word’s automated features. In order to automate it, Word needs to understand where one chapter starts and another finish so it is critical you have used a ‘Style’ for each of the chapter headings that you want to use in a header.
To create specific chapters in Word’s “mind” you need to use a Section break called ‘Next Page’. Having these in Word’s “mind” will allow it to automate processes for you later.
- Click before your chapter title (first title on the page)
- Layout
- Breaks
- Next Page
- You should see it break the page and your chapter will now start on its own page.
- Repeat this procedure for every chapter.
To open the header and footer editing options:
- Double click in one of the sections, ie the top or bottom cm or so of the page.
- Select ‘Header and Footer’ in the top menu
- You can then select some options:
- Different Odd & Even Pages
- Link to Previous (if you want the header style to stay the same through each section/chapter), this option is grayed out when in the first section/ there is only one section.
You can type text as you would normally, enter a name, a book title or anything that you want to be on every page throughout the book.
To add page numbers that automatically update with the document:
- Click in the footer section.
- Header and Footer
- Insert Page Numbers
To format the look of the page numbers, select them and use the standard formatting controls, ie centre alignment, bold etc.
If you would like to add the chapter title or similar information to the header, you can automate this:
First, you need to ensure you have the ‘reference’ ie. the chapter titles all specified using their own ‘Style’.
Second, you need to check each one is ‘broken’ by the section break ‘next page’.
Finally we are ready to insert the automatic header:
- Insert
- Field
- Links and References
- StyleRef
In the text box, you will have to write the formula code, Word will prepopulate the ‘STYLEREF’ you need to add one ‘space’ and then in speech marks the exact name of the style you want to have in the header.
There you have it, you can see Word automatically knew we were in Chapter Two and added that into the header.
Unfortunately, our chapter start pages are ugly… it repeats Chapter Two in the header and then as a heading.
Here you can see I have turned off the header, added back in the page number and it is looking okay. Before you can format the first page separately you need to set it to be formatted uniquely.
- Check ‘Different First Page’
- Insert Page Number
Congratulations. You have now automated headers and footers, and ensured consistency in style throughout your book! You’re one step closer to publishing a kick-ass book.
Adobe InDesign Walkthrough
In order to ensure consistency, and to save time. You do not want to manually enter headers on footers on every page so we will use InDesign’s automated features and Master Pages as opposed to Word where we used the ‘header and footer options’. In order to automate it InDesign needs to understand where one chapter starts and another finishes so it is critical you have used a ‘Paragraph Style’ for every one of the chapter headings that you want to use in a header. Master pages are a powerful part of a desktop publishing programme and one of the features that set InDesign apart from Word, you can also use them to create background elements for use throughout the book: colours, lines, circles…
Master pages are at the top of your ‘pages’ window.
In the pages you can see a letter on the top left indicating which master is applied. We want to double click on the ‘A-Master’ to open him up and put some headers and footers in.
Create a text box where you would like your page numbers to go. Here I have placed it across the text column at the bottom of the page.
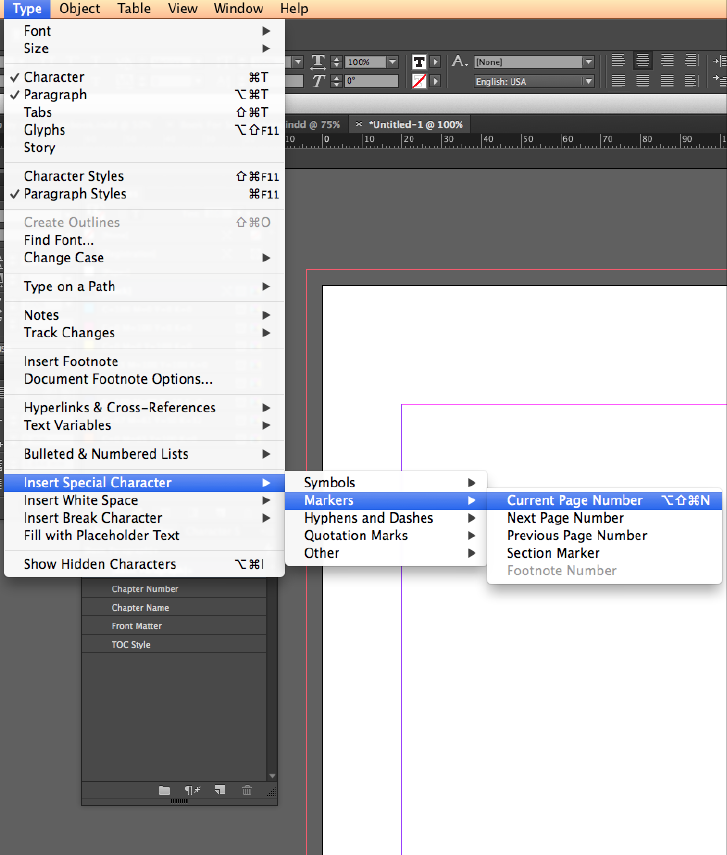
Type
Insert special character
Markers
Current page number
You can then format your page numbers to look however you want. They say ‘A’ because you are on the ‘A’ master.
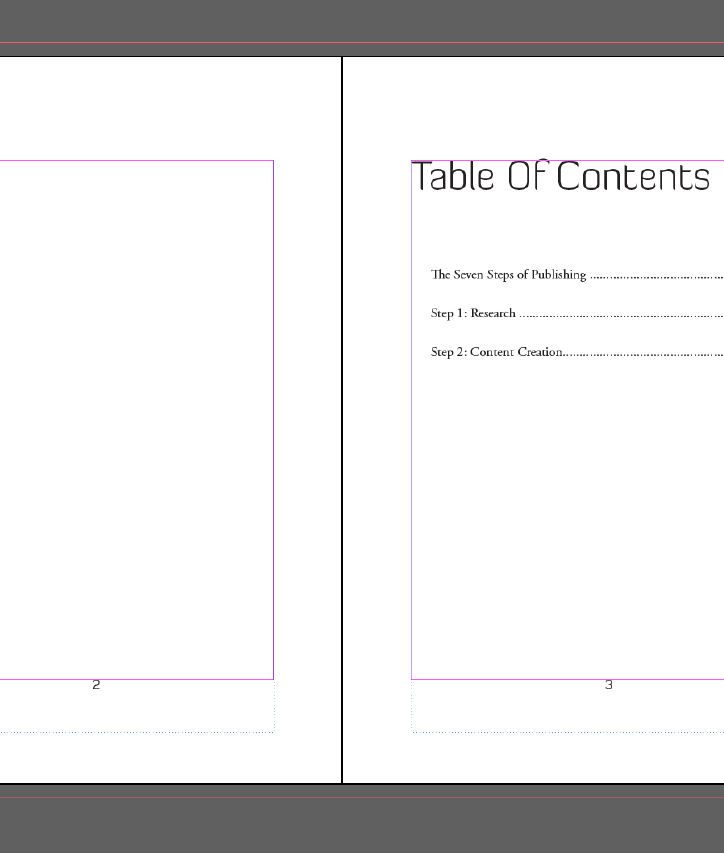
Take a look at any of the pages which have the master applied and you will see they now have the page numbers.
To create the headers, I have created two similar text boxes at the top of the page. On the left I have simply typed the title of my book. On the right hand header I want it to display the current chapter name. This is called a text variable and we will create a new one.
Type – > Text Variables – > Define.
Here is the text variables dialog box that opens.
- New
- Name: type a name
- Type: select ‘running header (paragraph style)
- Style: is to select which style it will place in the header (note not to style the header with, but which style/code it will look for and insert as the content into the header).
- Use: First on Page
- Select: OK
- Select the text variable just created ‘Header-Chapter Name’ in the menu on the left
- Click ‘insert’
You will now see the name of your text variable, up in the header inside of <> these brackets.
Jump back to any page with the master applied and you can see it now displays the chapter name.
Check another page; InDesign will have worked it out.
Let’s apply a master to different pages. You can do this two ways; firstly, by clicking and dragging the master page onto a page in the pages window.
Secondly, as shown here, by right-clicking, and selecting ‘Apply Master to Pages’.
Here I have selected to apply ‘no master’ to page 9. In your book I would do this to all the chapter start pages, and any blank pages.
Taking a look at page 9 and you can see it now has no master applied.
Here you can see I have applied no master to the blank pages and the chapter pages, whilst the other pages all have master ‘A’ applied.
Take a look at our work now, the chapter pages and text pages both look good.
Congratulations. You have now automated headers and footers, and ensured consistency in style throughout your book! You’re one step closer to publishing a kick-ass book and changing the world one reader at a time 😉


